Adding Your Home Printer to Your Laptop
When you are at home, you cannot add a printer via Self Service. You will need to add your printer manually.
USB Printers
If you do not have a WiFi printer, all you need to do is connect your laptop to the printer via a USB cable. The laptop should automatically detect the printer. If a pop-up appears asking to download software for the printer, download it to ensure the printer functions properly.
WiFi Printers
WiFi printers connect to your network to enable wireless printing from any device that is also connected to your network. To setup your WiFi printer on your district laptop, please follow these steps.
Open System Preferences
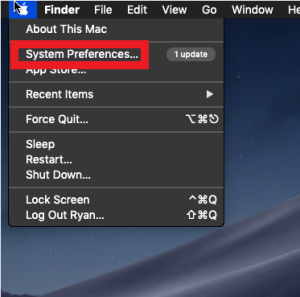
To add a printer manually, the first step is to open Systems Preferences. This can be done by clicking the Apple logo in the top left corner of your screen and selecting System Preferences as shown below.
Opening Printers and Scanners
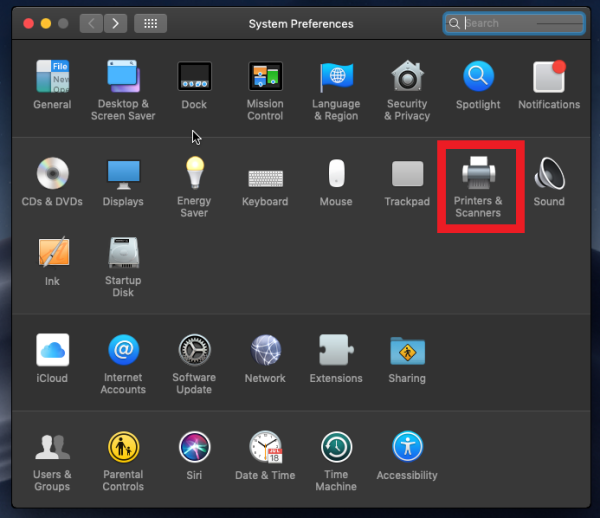
Next, we want to open up Printers and Scanners. You can do this by clicking on the Printers and Scanners icon in the System Preferences window as shown below.
If your System Preferences window does not look like what you see here, click the Grid icon in the top left near the arrows.
Printers and Scanners
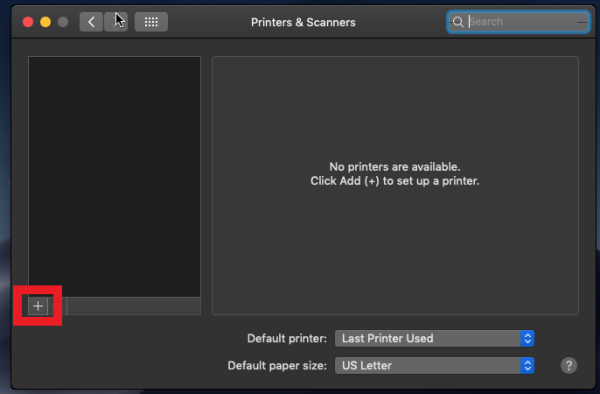
Now that you have the Printers and Scanners window open, look for the + icon near the bottom left. This is how you will add your printer.
Adding Your Printer
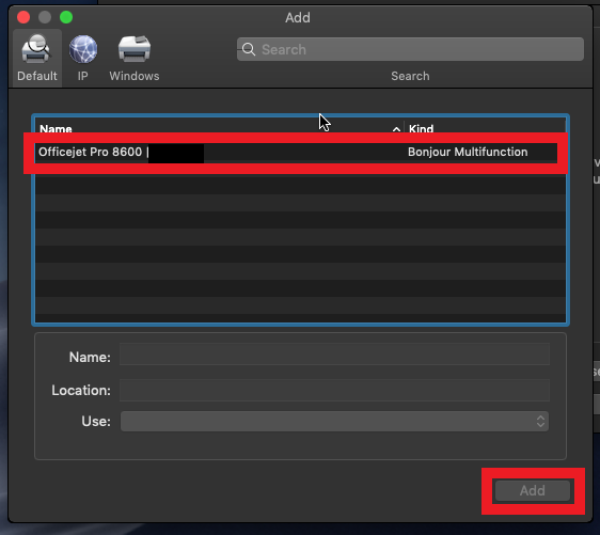
Another window will open. If your printer is connected to your network, it should show up in this window. Click on it and then click Add in the bottom right.
After your laptop adds the printer, you should be all set.
If you are having trouble Apple has more detailed resources that can be found Here.
You can also open a Helpdesk ticket for assistance.
If you have issues that are not covered by the documentation please visit the Helpdesk.


