Table of Contents
2-Factor Authentication
Getting Started
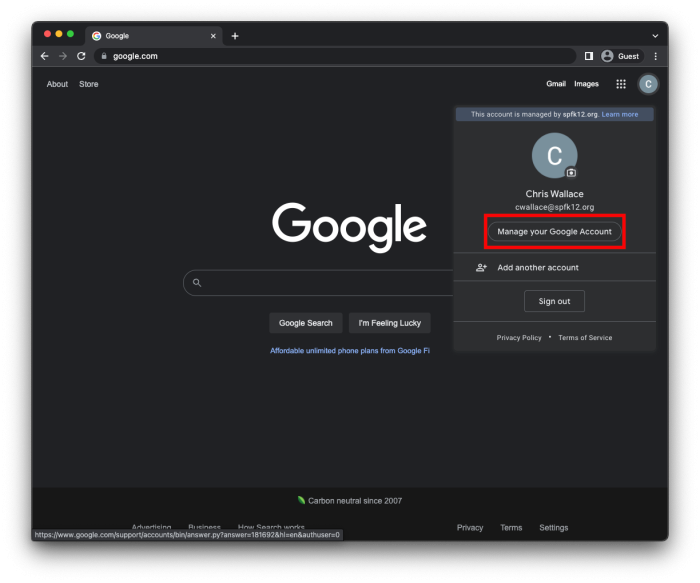
To start the process you will need to open up Google Chrome and navigate to your Google profile either by typing myaccount.google.com into the URL bar or clicking on your account icon and selecting “Manage your Google Account”.
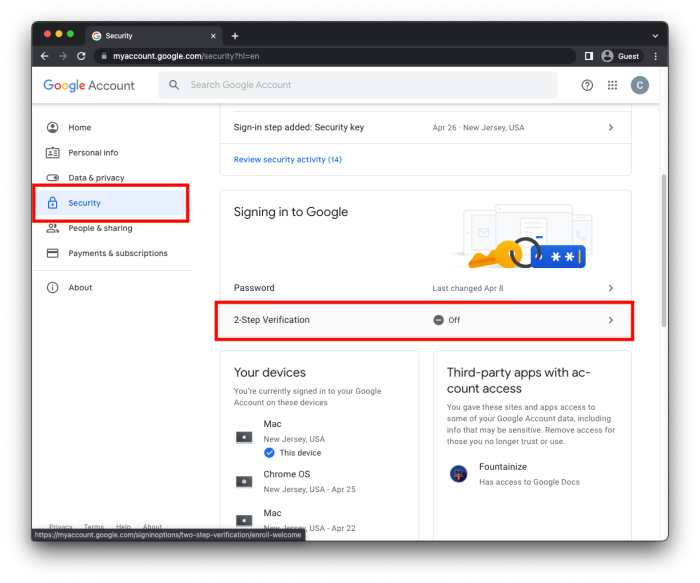
Once you are on your Google account page, click on Security and then 2-Step Verification.
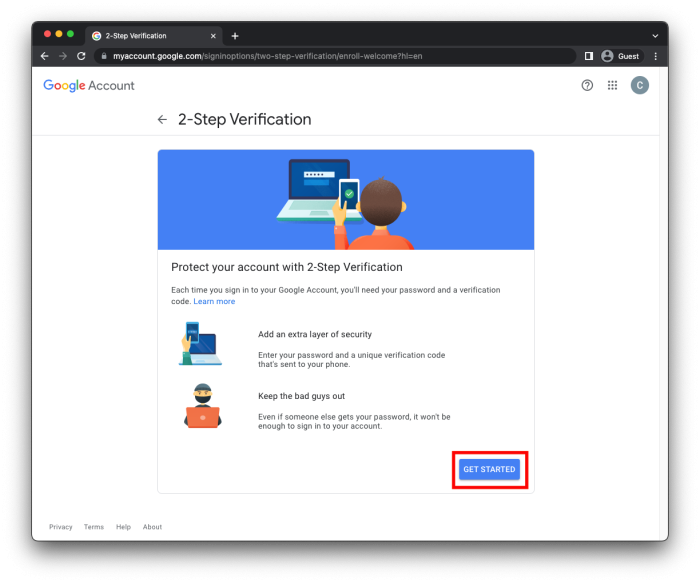
Click on Get Started.
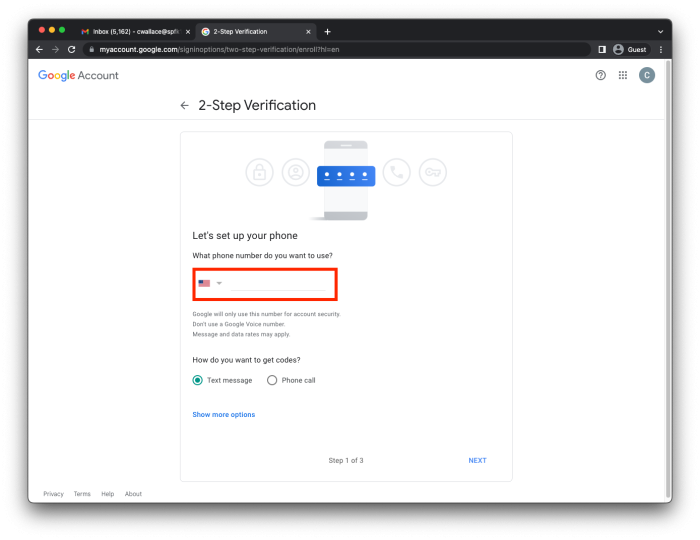
You will need to enter your phone number. This is temporary and can be removed later. Then click “Next”.
Setting up Google Authenticator
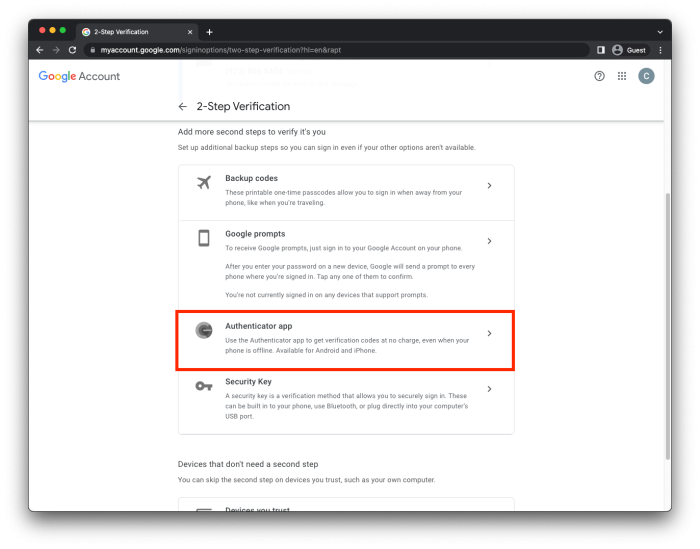
If you scroll down on the page a little, you will see several secondary options for Two-Factor verification. Choose Google Authenticator.
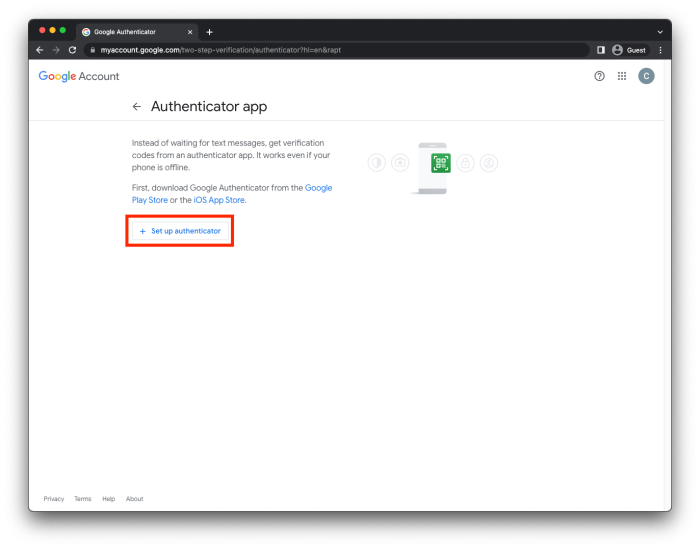
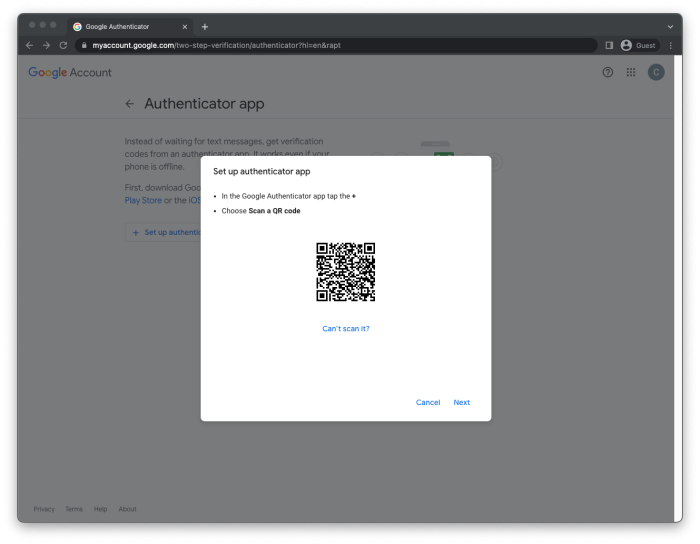
Click Set up authenticator.
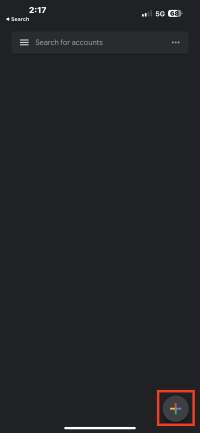
In order to proceed we will need to take a bit of a detour. Open your phone app store(on iPhone The App Store, on Android The Play Store). Find and download the Google Authenticator app. Once you have it, tap “Get Started” and then the + symbol.
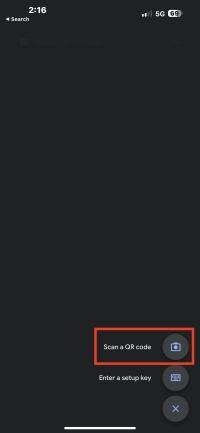
Choose “Scan a QR code” and scan the QR code on your computer screen.
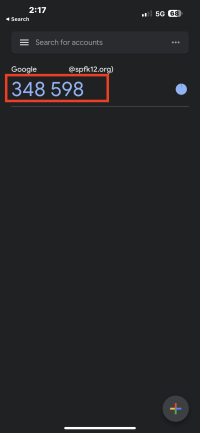
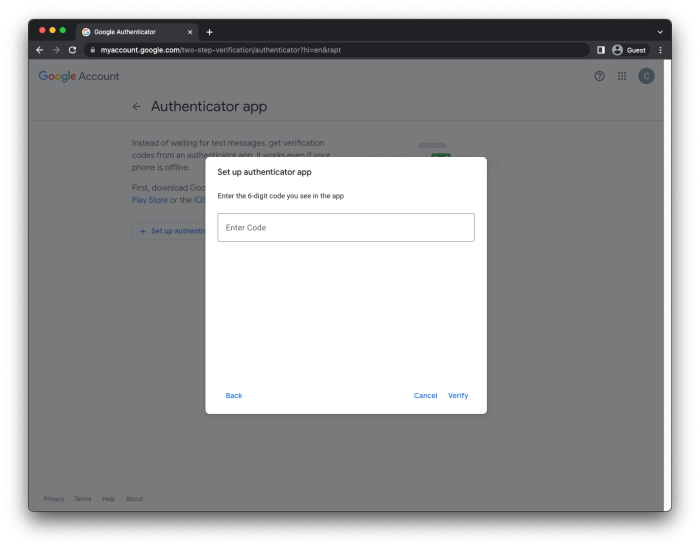
Once you have scanned the QR code, you will see a 6 digit number and a slowly disappearing circle on your phone. The circle is a timer, when it runs out the Authenticator app automatically generates a new code. Input the code you see on your phone into the text field on your laptop.
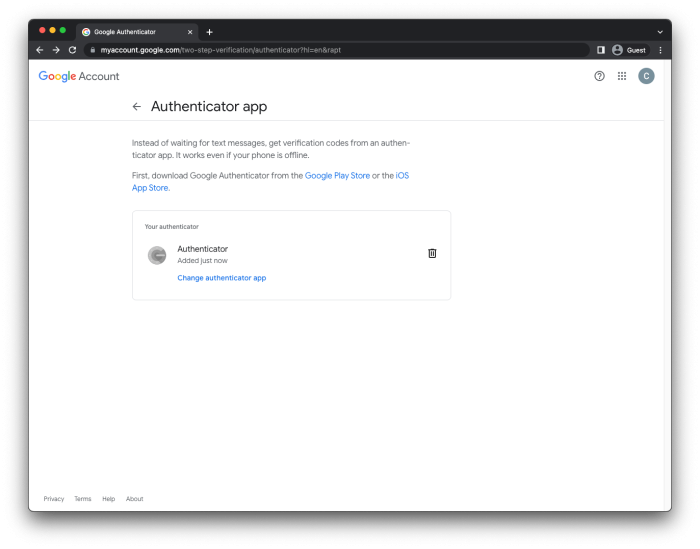
Once you have done that you should see a screen like the one below that indicates you have successfully added Google Authenticator.
Setting up Backup Codes
If you prefer to not use your phone at all, there is another option. Please see our wiki on Setting up Backup Codes.
Removing Your Phone Number
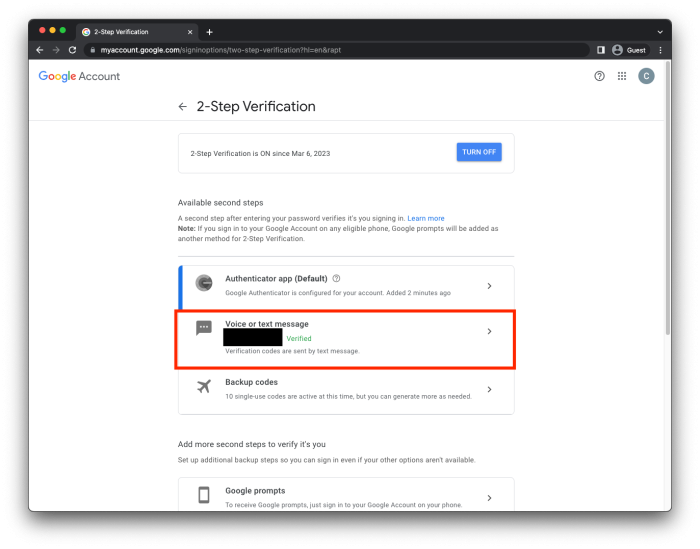
Once you have a secondary option setup, you can remove your phone number. Click on Voice or text message.
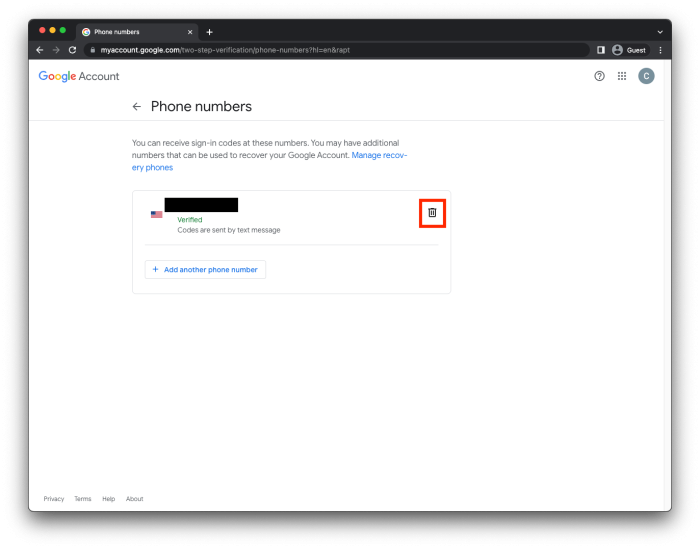
Click on the Trash Can icon on the right side of the screen.
If you have issues that are not covered by the documentation please visit the Helpdesk.
