Google Meet
As a note. Please use Hangouts Meet in the Chrome browser. You only have access to the full set of features while in Chrome. Safari, Edge and Firefox will allow you to join the meeting and participate, but will limit access to many of the extended features.
Also, you can include anyone in a Hangouts Meet. Parents without district or google accounts can join the meet. When they click the link or enter the meeting code they will be asked to enter their name and request permission. As the owner of the meeting you can allow or deny their request.
Creating a Meeting
First Visit meet.google.com
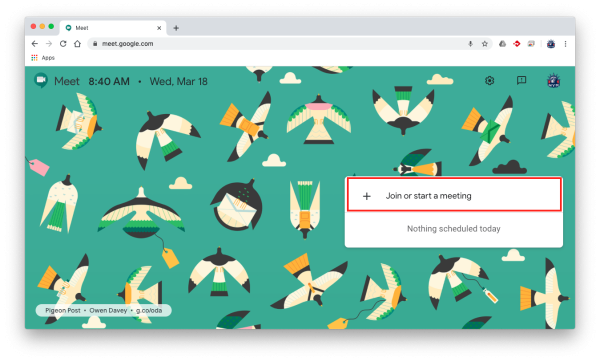
Then select Join or start a meeting
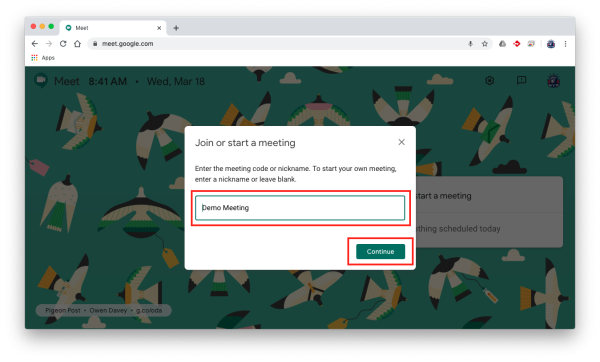
Give your meeting a name.
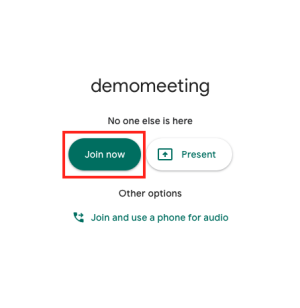
Join the meeting.
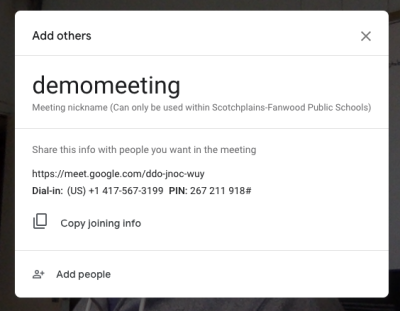
The next pane will give you all the info that you can share with others that may want to join the meeting.
On the next pane you can invite others to participate and they will receive an email or call from Google depending on how you choose to invite them.
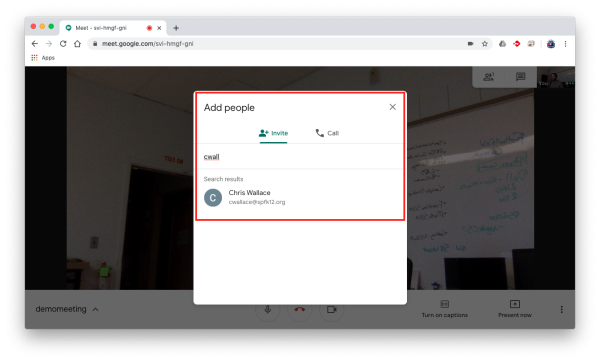
Once they are selected you can click Send Invite

Schedule a Meeting for a Future Date
First Visit calendar.google.com
Click on the desired date to begin making your event.
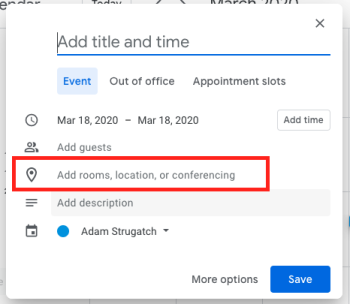
Give your event a name, select a time and date and add guests that you would like to attend.
Next you will click Add conferencing
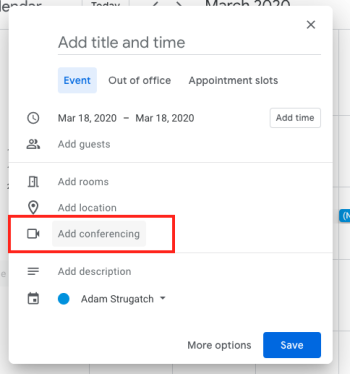
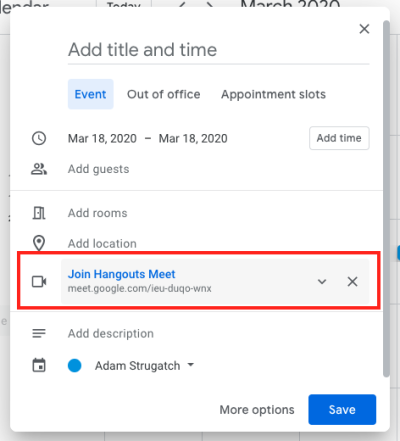
You will now see the meeting details where the Add conferencing button had been.
Select Save
You will be prompted to send an invite to your guests.
Sharing Your Screen
Sharing your screen, or Presenting as Hangouts Meet calls it, is a function that allows other to view your screen over the internet.
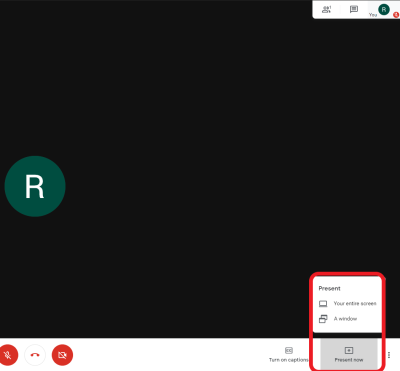
To begin Presenting, click on the Present now button towards the bottom right of your screen. You will be presented with two options, Your entire screen, or A window.
Your entire screen means that the people you are sharing with can see everything you are doing. They see exactly what you see. This is useful for if you are going to be changing windows/applications a lot while you are presenting.
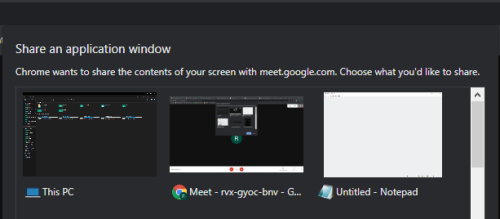
A window is an open application window. The application needs to be open or it will not show up in the pop-up that Chrome displays(you need to select what window you want to share from the pop-up box).
Note You must one of the options in order to proceed. Even if you intend to share all of your only screen, you must select it.
The application could be Chrome, Finder, Powerpoint, etc. It is important to note that if you choose a Chrome window all open tabs count as inside of the window, so they can be seen by others and you can freely switch between tabs to show your audience something in a different tab.
To stop Presenting, simply click onto the “You are presenting” button and click “Stop presenting”.
Recording the Meeting
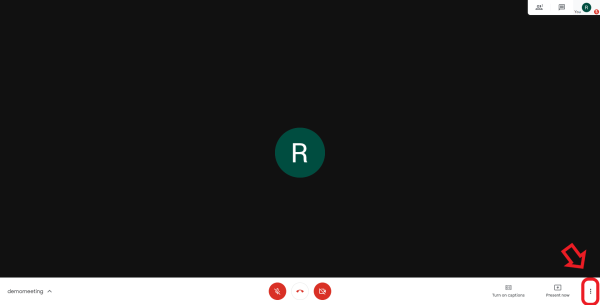
To record the meeting, click on the three dots in the bottom right corner of the window.
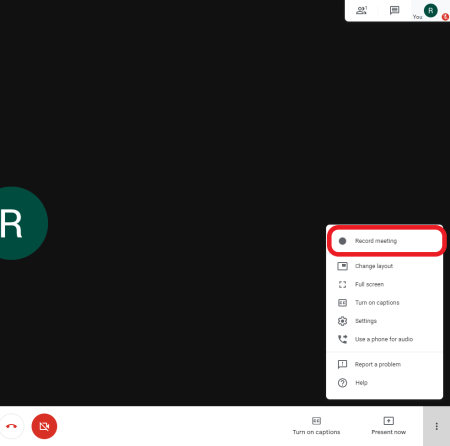
You will get a pop-up with many options. At the top will be the option you are looking for, “Record Meeting”.
Google will then prompt you to ask all participants for their consent, as recording without consent may be illegal. After you accept, a recording icon will appear in the top left-hand corner of the screen, indicating that the meeting is being recorded.
To stop recording, go to the three dots again and click “Stop Recording”. Google will then save a copy of the recording to your Drive. Please not that depending on the length of the recording, you may have to wait a fair amount of time before it is ready to be viewed from Drive. If you need access to the recording before it is finished processing, Google recommends downloading the recording. You will receive an email when the recording has finished uploading to your Drive.
If you have issues that are not covered by the documentation please visit the Helpdesk.
