Table of Contents
Athletic Trainer System
Locate & Launch Microsoft Remote Desktop
This is the Microsoft Remote Desktop icon. If it is not in your Dock, please check your Applications folder or search for it with Spotlight(the magnifying glass icon in the top right of your screen). If you do not see the icon in your Applications folder or after searching for it, please open a ticket at the Helpdesk.
Adding the Remote Desktop Connection
Step 1
Launch the Microsoft Remote Desktop App by clicking the icon on your dock or by locating it in your Applications folder.
Step 2
Once the application has launched, look for the little + symbol in the top left corner and click on it. 
Select Add PC from the drop down menu. This will open another window.
Step 3
Step 4
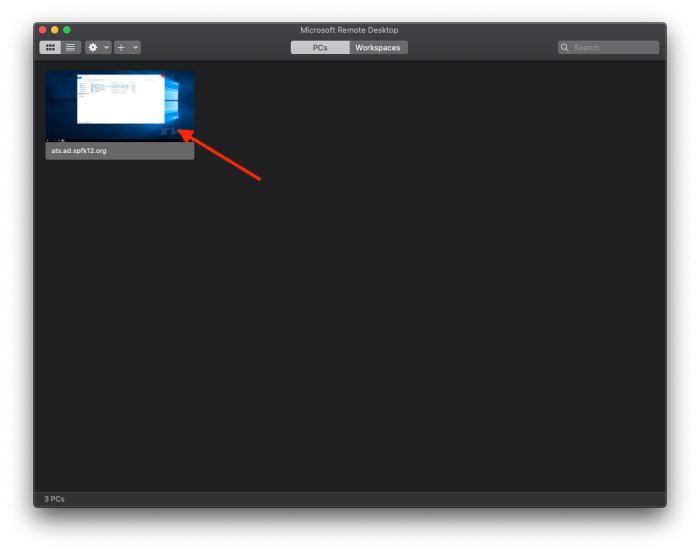
Click on the window that has appeared in Remote Desktop. It will prompt you to login. You can login with the same information you use to login to your laptop.
Step 5
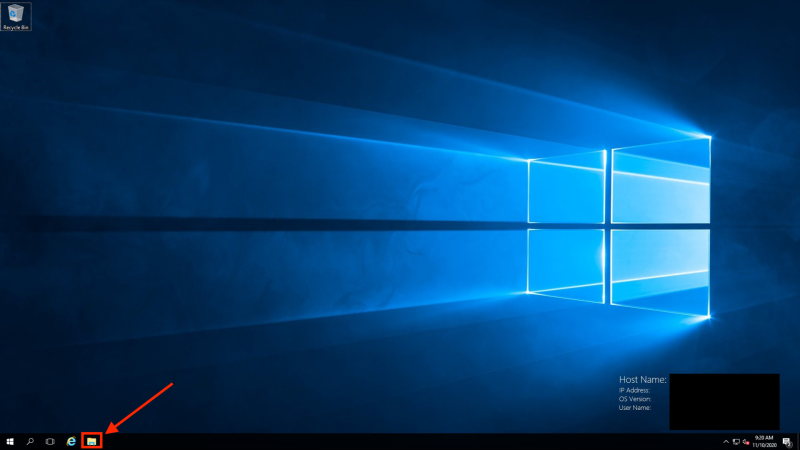
Once you are logged in, click on the icon for File Explorer in the taskbar.
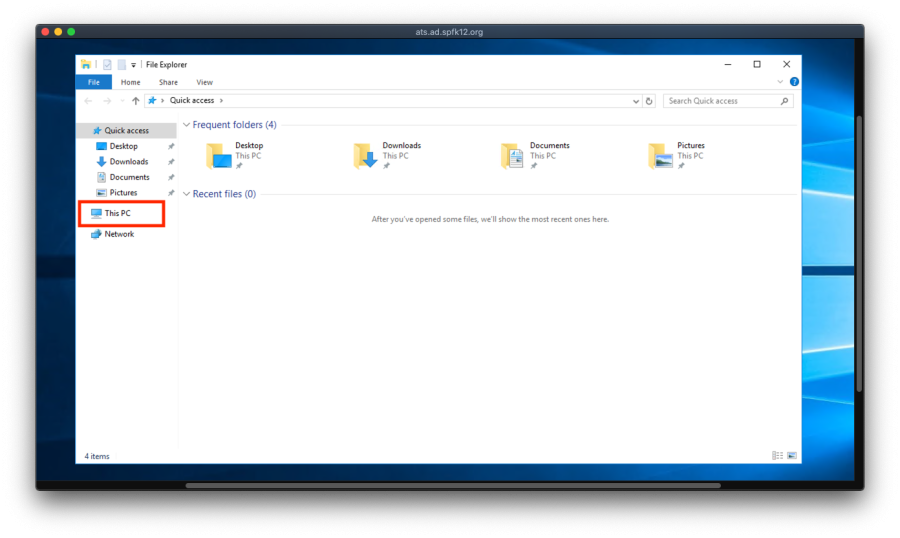
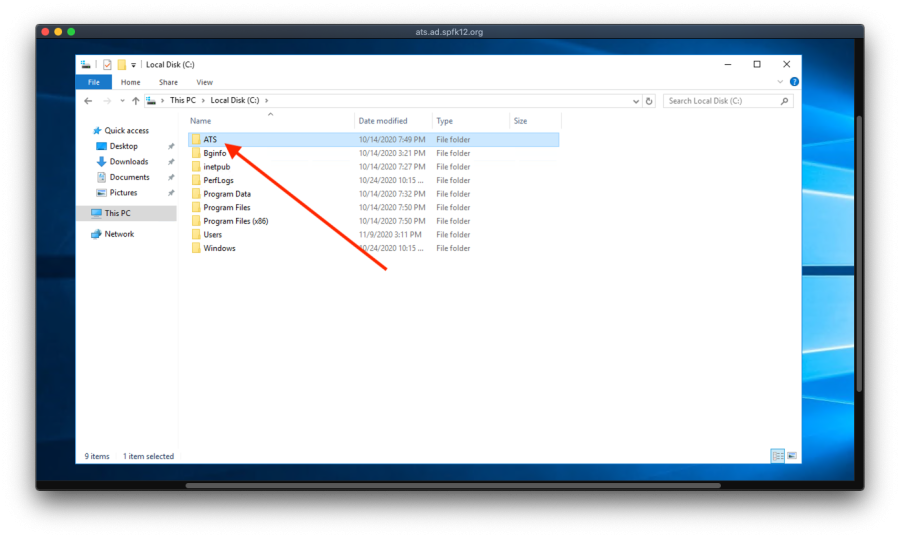
Click on This PC in the left navigation bar.
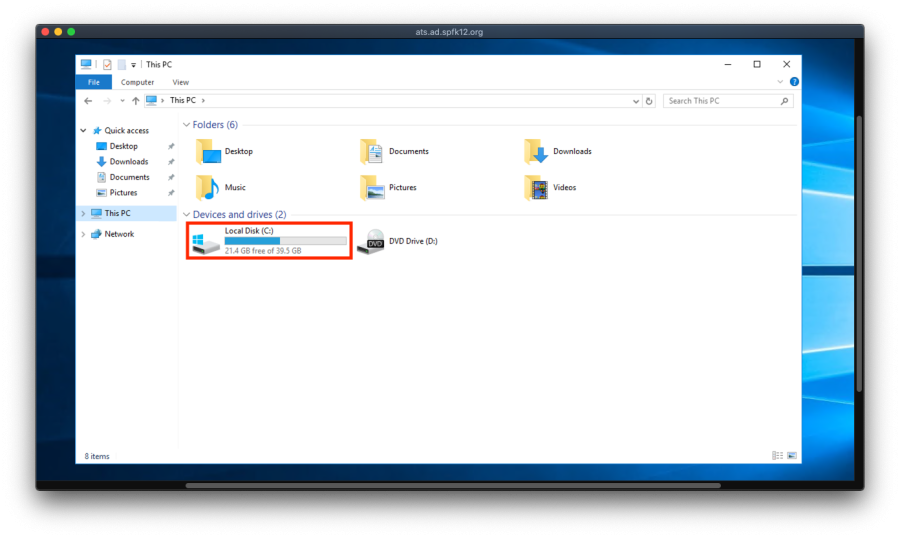
Click on Local Disk C.
Click on the ATS folder.
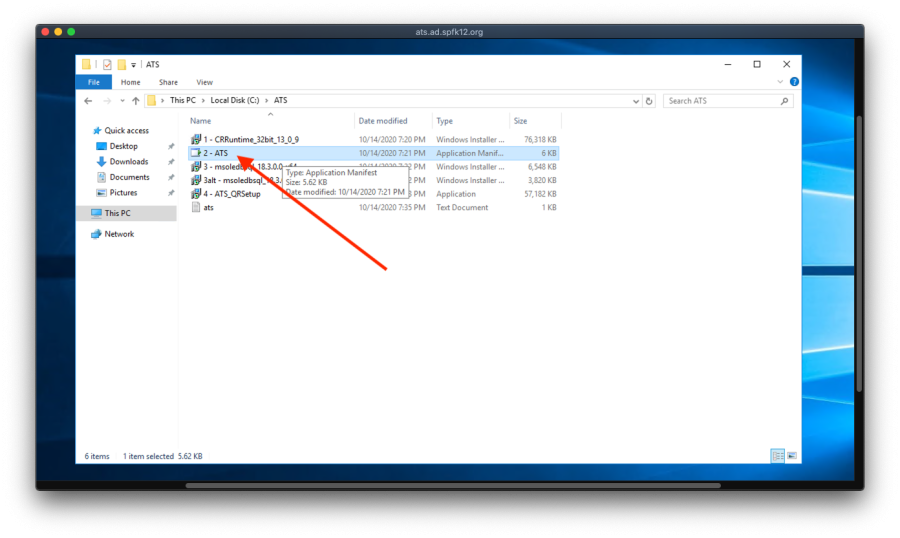
Click on the ATS file to launch the application.
Step 6
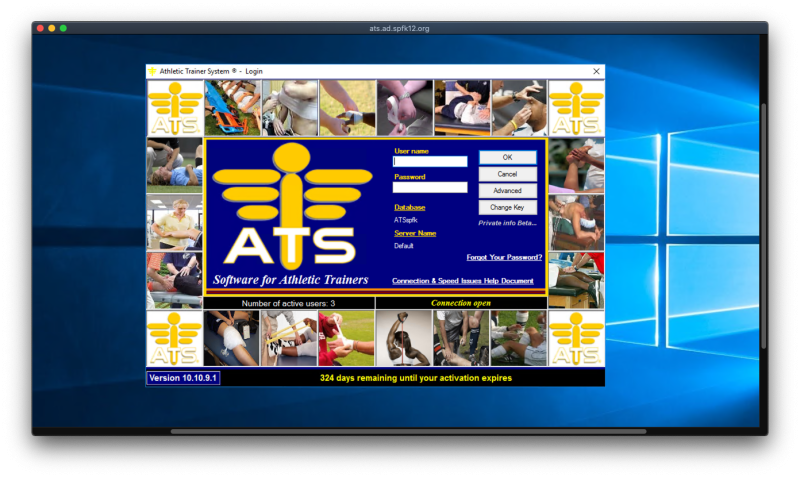
You will be prompted to install the application. Follow the prompts until it is installed, and then you should reach a login screen. Sign in with the appropriate information and you are all set.
Sign Out
This is a very important step, as multiple connections can cause issues with Remote Desktop.
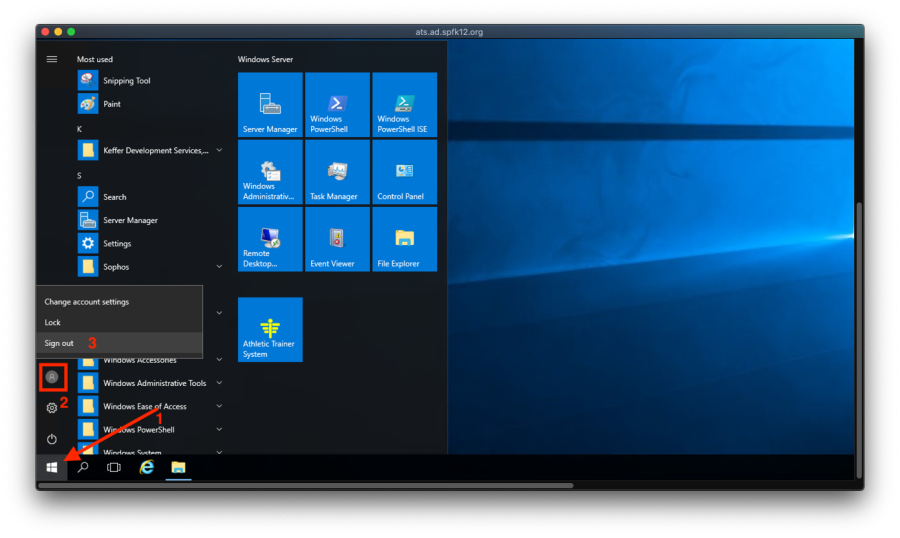
When you are done, please sign out by clicking on the Windows button in the bottom left of the screen, then clicking the person icon, then click Sign out.
If you have issues that are not covered by the documentation please visit the Helpdesk.


